*InfEdit를 위한 논문 리뷰 글입니다! 궁금하신 점은 댓글로 남겨주세요!
InfEdit paper: https://arxiv.org/abs/2312.04965
Inversion-Free Image Editing with Natural Language
Despite recent advances in inversion-based editing, text-guided image manipulation remains challenging for diffusion models. The primary bottlenecks include 1) the time-consuming nature of the inversion process; 2) the struggle to balance consistency with
arxiv.org
InfEdit github: https://github.com/sled-group/InfEdit
GitHub - sled-group/InfEdit: [CVPR 2024] Official implementation of CVPR 2024 paper: "Inversion-Free Image Editing with Natural
[CVPR 2024] Official implementation of CVPR 2024 paper: "Inversion-Free Image Editing with Natural Language" - sled-group/InfEdit
github.com
Contents
2. Background Knowledge: DDIM Inversion
Simple Introduction

최근 Generation 분야에서 핫한 키워드 중 하나는 'Training-Free'이다!
이는 훈련 없이, 모델의 성능을 올리거나 작업을 수행하는 방법론으로 매우 많은 방법들이 나오고 있다.
이번에 소개할 InfEdit은 training-free 방법으로 image를 editing할 수 있도록 diffusion model을 다루는 방법을 소개하고 있다!
기존에는 ddim inversion을 통해 얻은 noise를 직접적으로 활용하여 editing하는 방법들이 많았는데,
InfEdit은 inversion 없이 editing하는 방법을 소개한다!
논문의 보다 명확한 이해를 위해, ddim inversion을 먼저 익히고 가보겠습니다!
Background Knowledge: DDIM Inversion

기본적으로 DDIM inversion의 과정을 소개하면 아래와 같다.
1. Image Z_0에 noise를 계속 더하여 t steps의 noise image인 Z_T 만든다.
2. Z_T를 Diffusion model에 넣어서 Z_0로 sampling 한다.
만약 diffusion model이 완벽하게 noise를 예측할 수 있다면, 2번 과정을 걸쳐서 나온 Z_0는 input image와 반드시 같아진다.
하지만, diffusion model은 시간에 따른 cumulative error가 있기 때문에,
위의 이미지와 같이 inversion된 noise를 모델에 넣으면 기존과 좀 벗어난 이미지 결과가 나온다.
(위 과정을 reconstruction이라고 함.)

이제 조금만 더 자세히, DDIM inversion 과정을 살펴보겠습니다!
DDIM inversion의 첫번째 과정이, input image에 noise를 더하는 과정인데 이는 위의 수식 (12)에서 전개가 됩니다.
(이때 수식에서 sigma_t는 0으로 설정합니다. DDIM의 deterministic한 성질을 활용하기 위해)
1. input image X_0를 model에 넣어서 noise를 예측합니다.
2. 위 수식 (12)에서 우변의 X_t를 제외하고 다 좌변으로 넘겨서, X_(t-1)과 예측된 noise를 통해서 X_t를 만들어 냅니다.
3. 위 2번 과정으로 계속 반복하여, X_T까지 생성합니다.
# 자세한 코드는
# https://huggingface.co/learn/diffusion-course/unit4/2#inversion

# DDIM inversion 코드
current_t = max(0, t.item() - (1000 // num_inference_steps))  # t
next_t = t  # min(999, t.item() + (1000//num_inference_steps)) # t+1
alpha_t = pipe.scheduler.alphas_cumprod[current_t]
alpha_t_next = pipe.scheduler.alphas_cumprod[next_t]

# Inverted update step (re-arranging the update step to get x(t) (new latents) as a function of x(t-1) (current latents)
latents = (latents - (1 - alpha_t).sqrt() * noise_pred) * (alpha_t_next.sqrt() / alpha_t.sqrt()) + (
    1 - alpha_t_next
).sqrt() * noise_pred
코드로 표현하면 위와 같이 표현됩니다!
DDIM inversion 자체도 굉장히 효과가 있는 방법입니다.
왜냐하면 input image의 특성을 가지는 noise를 생성하고 이를 diffusion 모델에 넣어서 guidance하는 것이기 때문에, 생각보다 image editing이 어느정도는 됩니다!
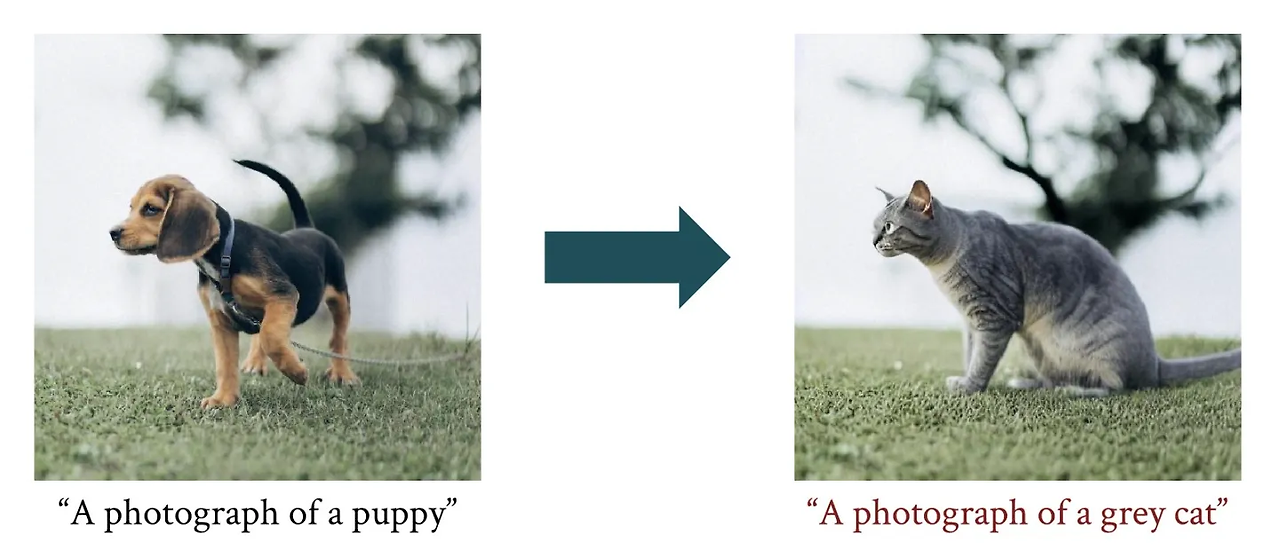
위의 예제처럼 puppy로 ddim inversion을 수행한 noise를 input으로 넣어서 cat prompt로 sampling을 하면, 기존 이미지의 특성을 어느정도 간직한 채 text prompt에 맞게 editing이 되는 것을 볼 수 있습니다.
(즉, random noise를 넣어주는 것이 아닌 어느정도 path가 정해진 noise를 넣어주기 때문에)
하지만 위의 예제도 체리피킹된 결과일 뿐, 실제로는 안되는 케이스가 매우 많고 성능도 좋지 못합니다.
또한 DDIM inversion 이용하여 editing을 수행하면, inversion+sampling을 걸쳐야 하므로 diffusion model의 inference가 2번 이루어지게 됩니다.
InfEdit은 inversion-free video editing 방법을 제안하여 아래의 주요문제들을 해결했습니다.
1. No inversion = one inference
2. Inversion 후 sampling 과정에서 이루어지는, 모델의 cumulative error를 방지
-> cumulative error의 정도는, reconstruction에서 확인 가능. (위의 DDIM inversion 단점 이미지 참고)
Method

InfEdit DDCM이라는 inversion-free 방법을 제안했습니다!
왼쪽 이미지는 ddim inversion으로부터 나온 noise으로부터 시작하는 반면, InfEdit은 input image으로부터 바로 시작합니다!
InfEdit의 핵심 아이디어는, 'input image에 각 step 별로 noise를 조금씩 추가해서 서서히 변화하게 만들자!' 입니다.


DDCM 알고리즘을 조금 더 살펴보면 아래와 같습니다.
1. Initial input Z_src_0는 input image를 의미합니다. (자세히 말하면, VAE에서 바로 나온 값)
2. Line 1: 마지막 T steps에서의 latent noise를 gaussian 분포에서 random sampling 합니다.
3. Line2: Noise_cons를 계산합니다. (알고리즘 사진 위에 있는 수식에서 noise를 계산하는 것)
-> T시점에서 latent image와 input image간의 차이를, noise 정보로 획득.
4. Line3: Prompt에 따라 source_noise, target_noise를 계산합니다.
5. Line4: (target-source)_noise + noise_cons를 통해 target prompt에 해당하는 noise 정보를 input image에 서서히 더합니다.
-> Noise_cons는 input image로 복원할 수 있는 guidance 역할
-> (target-source)_noise는 prompt에 차이에 따른 noise를 적용하는 역할
6. 위의 과정을 계속 반복!!

추가적으로, InfEdit은 United Attention Control (UAC)구조를 제안하여 attention feature를 통해 image editing을 도와주는 방법을 제안했습니다!
해당 내용은 크게 어렵지 않기 때문에 논문에서 자세한 내용을 참고하시길 바랍니다! (아니면 질문주세요!)
Result

- Input image로 부터 바로 guidance하기 때문에, consistency가 상당히 높다
- 여기서 VI+P2P, prompt2prompt 논문에서 제안한 방법과 inversion-free방법(DDCM=VI=Virtual inversion)을 활용했다는 것입니다!

- 다른 모델에 비해서 editing이 잘되고, 외형도 잘 변화하는 것을 볼 수 있다.
- 2025.06.08 Kyujinpy 작성.
(대학원 1학기가 벌써 끝났네요..ㅎㅎ)


